Sourdough Bread in a Jar Recipe
If you love homemade sourdough but want something a little more creative, this Sourdough Bread in a Jar is a fun recipe to try. Instead of baking one large loaf, the dough is divided into individual mini loaves and baked in suitable oven-safe jars.
Each loaf has a soft, fluffy interior, a lightly golden crust, and the naturally tangy flavor of sourdough. The individual size also makes these breads wonderful for breakfast, afternoon snacks, small sandwiches, or homemade gifts.
You can bake them plain or add rosemary, cheddar cheese, garlic, or dried cranberries for a flavorful twist.
Why You’ll Love This Recipe
- Makes four individual mini sourdough loaves
- Soft and fluffy with a mild tangy flavor
- Perfect for breakfast, snacks, and sandwiches
- Great for gifting and special occasions
- Easy to customize with sweet or savory ingredients
- Can be served fresh, toasted, or alongside soup
Ingredients
For the Dough
- 1 cup active sourdough starter, 100% hydration
- 1 cup warm water
- 2 tablespoons honey
- 2 tablespoons melted butter
- 3 cups bread flour
- 1 teaspoon salt
Optional Add-Ins
Choose one or combine several:
- 1 tablespoon dried rosemary
- ½ cup shredded cheddar cheese
- ¼ cup dried cranberries
- 1 teaspoon garlic powder
Equipment
- 4 wide-mouth pint-size jars that are specifically suitable for oven baking
- Large mixing bowl
- Dough scraper
- Clean kitchen towel or plastic wrap
- Baking sheet
- Wire cooling rack
- Oven mitts
Important Jar Safety
Not every glass jar is safe for baking. Use only jars that the manufacturer specifically states are suitable for oven use. Ordinary storage or canning jars may crack or break when exposed to high heat or sudden temperature changes.
Always follow the manufacturer’s instructions for the jars you use.
How to Make Sourdough Bread in a Jar
1. Mix the Dough
Add the active sourdough starter, warm water, honey, and melted butter to a large mixing bowl.
Stir until the ingredients are evenly combined.
Add the bread flour and salt. Mix with a wooden spoon or your hands until a rough, shaggy dough forms.
Turn the dough onto a lightly floured surface and knead for about 8–10 minutes, or until it becomes smoother and more elastic.
If you’re using a stand mixer, knead with the dough hook for approximately 5–6 minutes.
The dough should feel soft and slightly tacky but shouldn’t be excessively sticky.
2. Add Your Favorite Flavorings
If making flavored mini loaves, add the rosemary, garlic powder, cheddar cheese, dried cranberries, or your chosen combination during the final few minutes of kneading.
Work the ingredients into the dough gently so they are distributed evenly.
For a classic sourdough loaf, simply leave out the optional ingredients.
3. Let the Dough Rise
Place the dough in a lightly greased bowl and cover it with a clean kitchen towel or plastic wrap.
Leave it at room temperature for approximately 4–6 hours.
The fermentation time can vary depending on the temperature of your kitchen and how active your sourdough starter is.
The dough should become noticeably larger and close to doubling in size.
For a stronger sourdough flavor, you can refrigerate the dough after the first rise and let it rest overnight.
4. Prepare the Jars
Wash the oven-safe jars thoroughly and dry them completely.
Lightly grease the inside of each jar with butter or an appropriate nonstick coating. Make sure the bottom and sides are coated.
Place the jars on a baking sheet before filling them. This makes the jars easier to move and handle.
5. Divide and Shape the Dough
Turn the risen dough onto a lightly floured work surface.
Divide it into four equal pieces.
Take one portion and gently shape it into a smooth ball. Pull the outer edges toward the center and pinch the seams underneath.
Repeat with the remaining portions.
Place one dough ball into each prepared jar.
Don’t fill the jars too much. At this stage, the dough should occupy roughly one-third to one-half of the jar, leaving enough room for it to rise.
6. Give the Dough a Second Rise
Cover the filled jars loosely with a clean kitchen towel.
Let them rest at room temperature for approximately 1–2 hours.
The dough should become puffy and rise to around an inch below the rim.
Avoid allowing the dough to rise too far above the rim because it will continue expanding in the oven.
7. Bake the Mini Loaves
Preheat the oven to 375°F (190°C).
Once the oven is fully heated, carefully place the baking sheet with the filled jars inside.
Bake for approximately 25–30 minutes, or until the tops are golden brown.
For the most reliable doneness check, use an instant-read thermometer. The center of the bread should reach approximately 200°F (93°C).
If the tops become too dark before the bread is finished, loosely cover them with foil for the remaining baking time.
8. Cool the Bread
Carefully remove the baking sheet from the oven using oven mitts. The jars will be extremely hot.
Allow the bread to cool inside the jars for about 10 minutes.
If necessary, carefully run a thin knife around the edges to loosen the bread.
Remove the mini loaves from the jars and place them on a wire rack to cool completely.
Allowing the bread to cool before slicing gives the crumb time to finish setting and helps produce a better texture.
Serving Suggestions
These mini sourdough loaves are delicious in both sweet and savory combinations.
Try serving them with:
- Butter and honey
- Homemade jam
- Cream cheese
- Fruit preserves
- Olive oil and balsamic vinegar
- Scrambled eggs
- Avocado
- Soup or stew
You can also slice the mini loaves and use them to make small sandwiches.
For a simple breakfast, toast a few slices and top them with cream cheese and jam. For a savory option, serve toasted slices with butter, herbs, or olive oil.
Flavor Variations
Rosemary Cheddar Sourdough
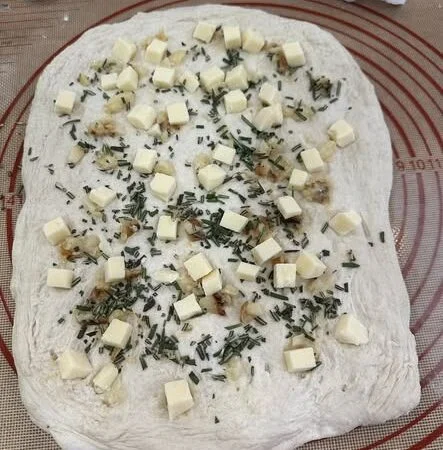
Add dried rosemary and shredded cheddar cheese to the dough. The combination creates a savory mini loaf that pairs especially well with soups and stews.
Garlic Herb Sourdough
Add garlic powder along with dried rosemary, parsley, or another favorite herb.
This version is especially delicious when toasted and served with butter.
Cranberry Sourdough
Mix dried cranberries into the dough for a slightly sweet and fruity loaf.
For additional sweetness, you can pair the cranberries with honey.
Cheddar Garlic Bread
Combine shredded cheddar cheese with garlic powder for a rich and savory mini loaf.
When adding extra ingredients, avoid using excessive amounts because they can make the dough heavier and affect how well it rises.
Tips for the Best Results
Use an Active Starter
A bubbly, active sourdough starter is essential for good fermentation. If your starter isn’t rising well after feeding, give it more time before beginning the recipe.
Pay Attention to the Dough
Sourdough doesn’t always follow an exact timetable. A warm kitchen can speed up fermentation, while a cool kitchen can slow it down.
Look for an increase in volume, bubbles, and a soft, puffy appearance.
Don’t Overfill the Jars
The dough needs enough room to expand during the second rise and baking. Keep the initial dough level relatively low in the jars.
Grease the Jars Thoroughly
A light, even coating of butter or suitable nonstick coating helps the finished bread release more easily.
Use Wide-Mouth Jars
Wide-mouth jars make it easier to add the dough and remove the baked mini loaves after cooling.
Bake on a Baking Sheet
Keeping the jars on a baking sheet makes them easier to move and provides a stable surface during baking.
Cool Before Slicing
Freshly baked bread continues to set as it cools. Waiting before slicing helps prevent a gummy or under-set center.
How to Store Sourdough Bread in a Jar
Let the bread cool completely before storing it.
Remove the loaves from the jars and place them in an airtight container or sealed food bag.
They can generally be kept at room temperature for up to 3 days.
For longer storage, wrap each loaf tightly and freeze for up to 2 months.
When you’re ready to eat them, thaw at room temperature and warm briefly in the oven, or simply toast individual slices.
If using the jars for presentation or storage, make sure both the bread and jars are completely cool before covering them. Don’t seal warm bread inside jars because trapped moisture can make the crust soft.
Frequently Asked Questions
Can I use any glass jar for this recipe?
No. Use only glass jars that are specifically rated for oven baking according to the manufacturer’s instructions. Regular storage jars may not be designed to withstand baking temperatures.
Why did my sourdough turn out dense?
A dense loaf can be caused by an inactive starter, insufficient fermentation, or dough that wasn’t given enough time to rise.
Make sure your starter is active and allow the dough to ferment until it shows clear signs of growth.
Can I make these loaves without the add-ins?
Yes. The plain version is delicious on its own and works well with butter, jam, honey, or cream cheese.
Can I refrigerate the dough overnight?
Yes. Refrigerating the dough after the first rise can give the bread a deeper sourdough flavor. Allow enough time for the dough to become active again before shaping if needed.
Can I freeze the mini loaves?
Yes. Cool the bread completely, wrap each loaf well, and freeze for up to about 2 months.
Final Thoughts
This Sourdough Bread in a Jar recipe is a creative way to turn homemade sourdough into adorable individual loaves. Each mini bread has a soft interior, golden crust, and delicious naturally fermented flavor.
Whether you keep them plain or add rosemary, cheddar, garlic, or dried cranberries, these mini loaves are perfect for breakfast, snacks, sandwiches, and homemade gifts.
Once you get comfortable with the basic recipe, experiment with your favorite herbs, cheeses, seeds, or dried fruits to create your own signature sourdough mini loaves.